What do the colors mean on the AirCasting app?
January 14, 2022How to end a measurement session
January 14, 2022Get to know your AirBeam/AQ-go sensor
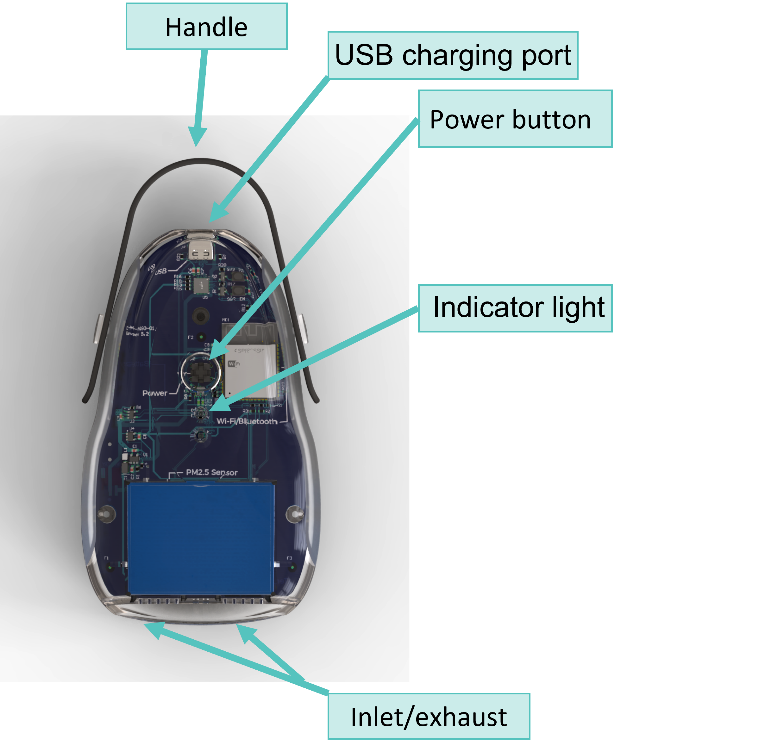
Here you will find descriptions for each part of the AirBeam/AQ-go sensor and the function of each one.
AQ-go
- Handle – The handle helps users carry the unit.
- USB charging port – This port enables you to charge the AQ-go.
- Power button – This turns the sensor on and off.
- Indicator light – This light indicates the status of the AQ-go.
- It appears solid red when the unit is charging. The red light turns off when the unit is fully charged.
- The light also indicates when the phone and sensor are connected. It is green when the sensor is ready to be connected to the phone, and turns white when the sensor is connected to the phone in an AirCasting session.
- Note: It is normal for the white light to turn off during the session to prolong the battery life
- PM sensor intake – The area where PM is drawn into the sensor.
- PM sensor exhaust – The area where PM exits the sensor.

AirBeam2
- Battery charging light – This light that indicates that the sensor is charging.
- PM sensor intake – The area where PM is drawn into the sensor.
- PM sensor exhaust – The area where PM exits the sensor.
- Connection indicator light – This light indicates when the phone and sensor are connected. It is green when the sensor is ready to be connected, and turns white when the sensor is connected to the phone in an AirCasting session. It is normal for the white light to turn off during the session.
- Power button – This button turns the sensor on and off.
- Belt clip attachment point – This area enables the user to attach the included belt clip to the sensor.
- Lanyard attachment – This area area can be used to attach the included lanyard to the sensor.


